Showing posts with label diy. Show all posts

Sunday, July 20, 2014

DIY Crochet Headguard

image

I crocheted this for my poor baby's forehead. She was five months back then. At this age, they bump their heads a lot of times. I know it's part of the learning process but I can't help but worry about her. Searched about Baby Helmets but they cost around Php 3k+ so I though why not make one.

How to do it:

1. Get the thickest yarn and biggest crochet hook that you have.

2. Measure around baby's head and create a base chain of that length.

3. You can use a Double Crochet or a Treble Crochet, whichever you want. I'm kinda impatient so I use the treble because it makes bigger stitches.

4. Crochet althroughout your base chain and double the width of the forehead.

5. Fold it in half horizontally and slip stitch or single crochet them together. You can make it thicker by doing triple the with and folding it three times.

6. Measure from one temporal area to another and create a base chain. Repeat the same procesa but only do 4 rows.

7. Slip stitch the guard part to the back part (other piece you just crocheted) and do the same on the other side.

Voila! Very inexpensive way to prevent bumpies on little baby's head or forehead at least.

***I own the rights to this pattern. You are free to sell whatever product you make out of it but don't sell the pattern as yours. Instead, link my blog as source if ever you're gonna use it as reference. Thanks.***

Doing your own hair color

Ten months after giving birth, I barely have any time for pampering myself. As you csn see on the picture below, my hair is already up to my waist (and that photo was from a few months back) and half of my hair is now black (which looks like "I-don't-have-time" to fix my hair or put on makeup or basically do anything). Honestly, exclusively breastfeeding, working at home, and taking care of chores is hardwork (however, my husband thinks otherwise).

image

So, I read a lot of blogs and watched a couple of videos in Youtube on how to color my own hair. Being a parent changes your life a lot. I've became super kuripot especially when I'm gonna spend the money in me. I'd rather spend it for my sweetie pie. Back to topic, I have very thin hair so even if I have very long hair, I didn't use as much hair coloring cream as I thought. Here is what I bought. (All products were purchased by me with my own money. This is not some endorsement review. All that I write here are my own opinion).

image

image

Here is what I did:
1. Comb your hair so it doesn't have any tangles. Don't shampoo your hair before dying it because it can remove the hair's natural oil and can leave it very dry after coloring it.

2. Divide your hair into 4 sections if you have thin hair like mine, or more, depending on the thickness of your hair. Clip all but one of the hair sections.

3. Start with coloring the first section (the one that you didn't clip) and work until you finish coloring all of it. I have short arms so I asked my husband to color the back part. Ask help if you need to.

4. Cover hair with a shower cap and leave it on as per the package instructions.

5. Wash it until water runs clear and condition, condition, condition your hair because it can dry your hair out.

Then, voila, new hair without spending thousands of pesos.

By the way ladies, when I bought the hair dyes from HBC, the cashier told me that they can color my hair for me since I went over Php 300.00. I, however, wasn't able to because the appointment was not til tomorrow noon and I have to go to a wedding. This is how my hair looks like now. (used Chestnut Brown by the way)

image

Monday, April 7, 2014

How to make malunggay powder

From my last post, I taught you guys on how to plant your very own malunggay tree. Now that it has grown leaves, I will be teaching you how to make malunggay powder. It is very easy to make and you can add it to just about anything.


  1. Gather malunggay leaves and remove the stems. Wash the leaves thoroughly and shake off excess water. (Alternative: Wash the leaves but don't remove them from the stem)
  2. Place leaves in a mesh net bag that you can buy at the public market. The leaves have to be air dried but not directly exposed to sunlight because it will lose its nutrients. Let it air dry for about three days. The mesh net bag looks like this: 


(Alternative: You can also hang them dry using a hanger with clothes pins. Don't forget to tie the end of the stems together using a rubber band or else they'll fall off and get dirty.) Then remove the leaves afterwards and proceed to the next step. You can hang them like this:


3. After three days or until it has completely dried, you can now roast the leaves under low heat for five minutes.


4. Now, you can use a blender or mortar and pestle to grind the leaves. 


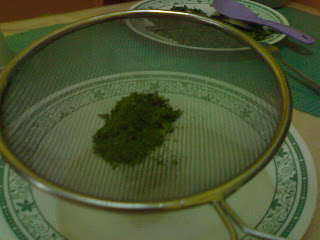
Then sift it afterwards.


Presto! You are now able to make your very own malunggay powder and it did not cost you anything. You can add this to almost any food or drink you want. 


If you're going to try this or have already did, I would love to hear how it came out or if you have any questions.

Credit to the owners of the photos used.


Sunday, April 6, 2014

Malunggay in your own backyard


Malunggay (Moringa Oleifera) for us breastfeeding moms is the best tree ever because it helps us increase our milk supply.

Lately, I have been searching for the best supplement to increase my supply. A mom from my Facebook group, Breastfeeding Pinays, said that she takes Natalac two to three times a day I think. So, as I was researching about this supplement, I found out that almost all of the galactogogues out there are made from the miracle tree, which they process into powders, teas, capsules, polvorons, biscuits etc. Basically, it is made of malunggay. At the drug store, capsules cost about Php 8.00 each. 

For me, quite expensive for something that you can grow in your own backyard.

Let's get started!

With growing malunggay, the easiest way is through cutting its stem. Just select branches with 2 to 2.5 inch diameter. Then, cut it to 2 to 2.5 ft length. 


To expose more of its surface area to the sandy soil this tree loves so much, cut the bottom part diagonally at a 45 degree angle.
Now, we can plant it. Dig around 8 to 10 inches and bury the stem cutting. Water it from every now and then and you'll notice leaves growing in no time.
  

Credit to the owners of the photos used.